반응형
이번 프로젝트에서는 서버와 연결해서 사용자의 정보를 저장하는 기능을 사용하기로 해서 이에 알맞은 react-hook-form을 사용하기로 했습니다.
📌 react-hook-form 설치하기
npm install react-hook-form
📌 React Hook Form으로 회원가입 폼 만들기
// useForm 함수를 불러옵니다.
import { useForm } from "react-hook-form";

function Registration() {
  // register()와 handleSubmit() 함수를 얻을 수 있습니다.
  const {
    register,
    handleSubmit,
  } = useForm();

  const submitForm = (data) => {
    console.log(data);
  };

  return (
    <div className="main">
      // form에는 onSubmit에는 submit했을 때 결과를 처리해주는
      // handleSubmit()을 사용합니다.
      <form onSubmit={handleSubmit(submitForm)} className={styles.items}>
        <div className={styles.item}>
          <label htmlFor="id">아이디</label>
          <input
            type="text"
            placeholder="아이디 입력"
            {/*
              각 input의 값을 저장할 변수명을 작성합니다.
            */}
            {...register("id")}
          />
          <span className={styles.id_warning_msg}>중복 불가능</span>
        </div>
        <div className={styles.item}>
          <label htmlFor="id">비밀번호</label>
          <div>
            <input
              type="text"
              placeholder="비밀번호 입력"
            />
            <input
              type="text"
              placeholder="비밀번호 재입력"
              {...register("password")}
            />
          </div>
        </div>
        <div className={styles.item}>
          <label htmlFor="id">닉네임</label>
          <input
            type="text"
            placeholder="닉네임 입력"
            {...register("nick")}
          />
        </div>

        <button
          type="submit"
        >
          회원가입
        </button>
      </form>
    </div>
  );
}

export default Registration;
useForm() 함수 설명
1. register(): input에 값을 입력할 때 해당 값을 저장할 변수이름을 정해주는 함수입니다.
2. handleSubmit(): submit 버튼을 눌렀을 때 form의 전체적인 데이터 처리를 해주는 함수입니다.
📌 중복 제출 방지하기
import { useForm } from "react-hook-form";

function Registration() {
  const {
    register,
    handleSubmit,
    // isSubmitting으로 제출 중인지 상태를 확인해줍니다.
    formState: {isSubmitting}
  } = useForm();

  const submitForm = (data) => {
    console.log(data);
  };

  return (
    <div className="main">
      <form onSubmit={handleSubmit(submitForm)} className={styles.items}>
        <div className={styles.item}>
          <label htmlFor="id">아이디</label>
          <input
            type="text"
            placeholder="아이디 입력"
            {...register("id")}
          />
          <span className={styles.id_warning_msg}>중복 불가능</span>
        </div>
        <div className={styles.item}>
          <label htmlFor="id">비밀번호</label>
          <div>
            <input
              type="text"
              placeholder="비밀번호 입력"
            />
            <input
              type="text"
              placeholder="비밀번호 재입력"
              {...register("password")}
            />
          </div>
        </div>
        <div className={styles.item}>
          <label htmlFor="id">닉네임</label>
          <input
            type="text"
            placeholder="닉네임 입력"
            {...register("nick")}
          />
        </div>

        <button
          type="submit"
          {/*
            submit이 되었다면 isSubmitting은 true가 되어
            버튼이 비활성화(disabled)가 됩니다.
          */}
          disabled={isSubmitting}
        >
          회원가입
        </button>
      </form>
    </div>
  );
}

export default Registration;
isSubmitting 함수 설명
- formStata는 form이 현재 어떤 상태인지를 알려주는 속성입니다.
- 사용자가 실수로 여러 번 버튼을 클릭해 제출하면 오류가 생길 수 있기 때문에 이것을 방지하기 위해 자주 사용되는 함수입니다.
- 값은 true 또는 false를 반환해줍니다.
📌 입력값 검증하기
import React, { useState } from "react";
import { useForm } from "react-hook-form";

function Registration() {
  const {
    register,
    handleSubmit,
    // isSubmitted는 제출되었다는 상태를 의미하고
    // errors는 입력값에 맞는 오류 내용을 가지고 있습니다.
    formState: {
      isSubmitting,
      isSubmitted,
      errors
    }
  } = useForm();

  // 비밀번호를 입력했을 때 저장할 변수입니다.
  // 비밀번호를 재입력했을 때 비교하기 위해 사용합니다.
  const [password, setPassword] = useState("");

  const submitForm = (data) => {
    console.log(data);
  };

  return (
    <div className="main">
      <form onSubmit={handleSubmit(submitForm)} className={styles.items}>
        <div className={styles.item}>
          <label htmlFor="id">아이디</label>
          <input
            type="text"
            placeholder="아이디 입력"
            {/*
              form이 제출된 상태일 때 error가 있는지 없는지 확인해주고
              만약 에러가 있다면 message에 정의된 경고문이 보여지게 됩니다.
            */}
            aria-invalid={
              isSubmitted ? (errors.id ? "true" : "false") : undefined
            }
            {/*
              input이 필수이면서 최소 길이와 최대 길이를 정한 다음
              이에 맞는 값이 입력되도록 해줍니다.
            */}
            {...register("id", {
              required: "아이디는 필수 입력입니다.",
              minLength: {
                value: 8,
                message: "8자리 이상 아이디를 사용하세요",
              },
              maxLength: {
                value: 15,
                message: "15자리 이하 아이디를 사용하세요",
              },
            })}
          />
          <span className={styles.id_warning_msg}>중복 불가능</span>
          {/*
            error가 발생하면 알맞는 message를 화면에 보여줍니다.
            저는 span을 사용했습니다.
          */}
          {errors.id && (
            <span className={styles.error_msg}>{errors.id.message}</span>
          )}
        </div>
        <div className={styles.item}>
          <label htmlFor="id">비밀번호</label>
          <div>
            <input
              type="text"
              placeholder="비밀번호 입력"
              onChange={(e) => {
                setPassword(e.target.value);
              }}
            />
            <input
              type="text"
              placeholder="비밀번호 재입력"
              {/*
                비밀번호에 대한 규칙은 재입력했을 때 비밀번호와 일치하고
                규칙에 맞는지 한 번에 보여주기 위해 재입력 부분에
                register과 errors에 대한 내용을 정의했습니다.
              */}
              aria-invalid={
                isSubmitted
                  ? errors.password
                    ? "true"
                    : "false"
                  : undefined
              }
              {/*
                비밀번호를 재입력 했을 때 원래 비밀번호와 동일한지
                비교할 수도 있습니다.
              */}
              {...register("password", {
                required: "비밀번호는 필수 입력입니다.",
                pattern: {
                  value: new RegExp(`${password}`, "g"),
                  message: "비밀번호가 일치하지 않습니다.",
                },
                minLength: {
                  value: 10,
                  message: "10자리 이상 아이디를 사용하세요",
                },
                maxLength: {
                  value: 20,
                  message: "20자리 이하 아이디를 사용하세요",
                },
              })}
            />
            {errors.password && (
              <span className={styles.error_msg}>
                {errors.password.message}
              </span>
            )}
          </div>
        </div>
        <div className={styles.item}>
          <label htmlFor="id">닉네임</label>
          <input
            type="text"
            placeholder="닉네임 입력"
            aria-invalid={
              isSubmitted ? (errors.nick ? "true" : "false") : undefined
            }
            {...register("nick", {
              required: "닉네임은 필수 입력입니다.",
              maxLength: {
                value: 10,
                message: "10자리 이하 닉네임을 사용해주세요.",
              },
            })}
          />
          {errors.nick && (
            <span className={styles.error_msg}>{errors.nick.message}</span>
          )}
        </div>

        <button
          type="submit"
          disabled={isSubmitting}
        >
          회원가입
        </button>
      </form>
    </div>
  );
}

export default Registration;
입력값 규칙 설명
1. required: 필수로 입력해야 하는 값을 나타냅니다.
2. pattern: 특정 값에 맞게 입력해야 하는 값에 사용합니다.
3. minLength: 최소 길이가 지정된 입력값에 적용합니다.
4. maxLength: 최대 길이가 지정된 입력값에 적용합니다.
5. value: 길이의 개수나, 특정 입력값을 지정할 수 있습니다.
5. message: 어떤 오류가 발생했는지를 저장하고 화면에 보여줄 수 있습니다.
오류 발생 여부 설명
1. aria-invaild: 스크린 리더기를 사용할 때 읽어지지 않도록 설정할 수 있습니다.
2. isSubmitted: form이 제출된 상태라면 true를 아니라면 false를 반환합니다.
3. errors.변수명: register로 지정한 변수명을 사용하고, 오류가 발생했다면 true를 아니라면 false를 반환합니다.
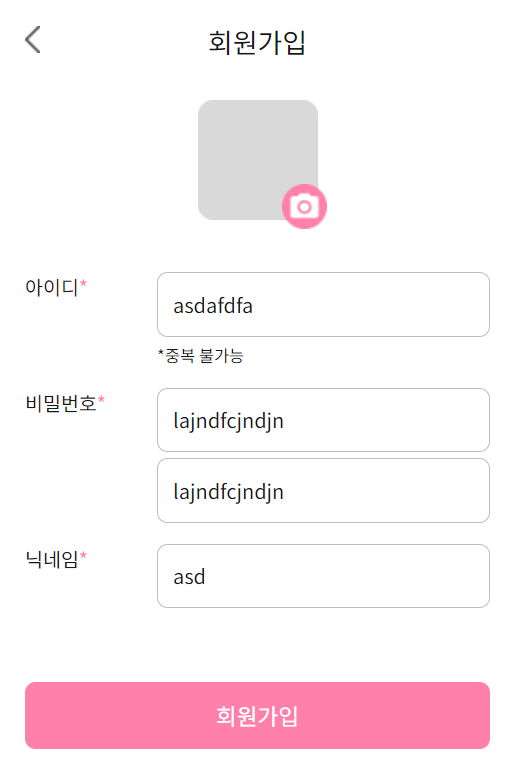
📌 결과

입력값 검증에서 오류 발생 화면


회원가입 성공

728x90
'React JS' 카테고리의 다른 글
| npx create-react-app 오류 해결 방법 (0) | 2023.11.05 |
|---|---|
| Objects are not valid as a React child 에러 처리 (0) | 2023.01.12 |
| 채팅 중복 없이 저장하기 (0) | 2023.01.07 |
| 채팅창 만들기 React (0) | 2023.01.02 |
| react-live-clock 사용하기 (0) | 2023.01.01 |