반응형
PedroTech님의 풀스택 강의 7일 차를 참고하였습니다.
📌 Comments 테이블의 데이터 가져오기
// ./client/src/pages/Post.js

function Post() {
  let { id } = useParams();
  const [comments, setComments] = useState([]);

  useEffect(() => {
    axios
      .get(`http://localhost:3001/posts/byId/${id}`)
      .then((response) => {...
      });

    // Comments 테이블의 데이터를 가져오는 axios 입니다.
    axios
      .get(`http://localhost:3001/comments/${id}`)
      .then((response) => {
        setComments(response.data);
      });
  }, []);

  ...

  }
router에서 정의해 놓은 경로를 참고해서 http://localhost:3001/comments/${id}로 테이블을 가져옵니다.
경로의 의미
- useParams()로 가져온 id와 같은 값을 가지고 있는 데이터만 반환해 줍니다.
(위 사진을 예시로 든다면, id에는 2의 값이 들어가 PostId가 2인 데이터만을 반환합니다.)
📌 댓글 작성 후 Comments 테이블로 데이터 전송하기
// ./client/src/pages/Post.js

function Post() {
  ...

  let { id } = useParams();
  const [comments, setComments] = useState([]);
  const [newComment, setNewComment] = useState("");

  const addComment = () => {
    axios
      .post("http://localhost:3001/comments", {
        commentBody: newComment,
        PostId: id,
      })
      .then((response) => {
        const commentToAdd = { commentBody: newComment };
        setComments([...comments, commentToAdd]);
        setNewComment("");
      });
  };
POST 코드 설명
http://localhost:3001/comments로 데이터(newComent, id)를 보냅니다.
then 코드 설명
1. {commentBody: newComment}: HTML을 사용해서 데이터를 보여줄 때 commentBody 속성을 사용하기 때문에 이와 같은 형식으로 데이터를 저장했습니다.
2. setComments()로 직접 데이터를 넣은 이유: 새로운 댓글이 작성될 때마다 axios로 Comments에 있는 데이터를 불러오는 것보단, 직접 데이터를 넣어서 사용자에게 바로 보일 수 있기 위해서입니다.
📌 브라우저에 댓글 보여주기
function Post() {
  let { id } = useParams();
  const [postObject, setPostObject] = useState({});
  const [comments, setComments] = useState([]);
  const [newComment, setNewComment] = useState("");

  useEffect(() => {...
  }, []);

  const addComment = () => {...
  };

  return (
    <div className="postPage">
      <div className="leftSide">
        <div className="posts" id="individual">
          <div className="title">{postObject.title}</div>
          <div className="body">{postObject.postText}</div>
          <div className="footer">{postObject.username}</div>
        </div>
      </div>
      <!-- 댓글(Comments)를 보여주는 부분입니다. -->
      <div className="rightSide">
        <div className="addCommentContainer">
          <input
            type="text"
            placeholder="Comment..."
            autoComplete="off"
            value={newComment}
            onChange={(event) => {
              setNewComment(event.target.value);
            }}
          />
          <button
            type="submit"
            onClick={() => {
              addComment();
            }}
          >
            Add Comment
          </button>
        </div>
        <div className="listOfComments">
          {comments.map((comment, key) => {
            return (
              <div key={key} className="comment">
                <span>{comment.commentBody}</span>
              </div>
            );
          })}
        </div>
      </div>
    </div>
  );
}
input 태그 설명
1. value: input의 초기값을 설정할 때 사용하는 속성입니다. input의 데이터를 저장하는 newComment를 초기값으로 주었습니다.
2. onChange(): input에 값을 입력할 때마다 활성화되는 함수입니다. newComment에 input 값을 저장하기 위해 사용했습니다.
button 태그 설명
1. onClick: button 태그를 클릭하면 활성화되는 함수입니다. input에 댓글을 다 입력했다면 버튼을 클릭해 addComment()가 실행될 수 있도록 했습니다.
map 함수 설명
1. comments.map(comment, key): 댓글을 저장하고 있는 comments에 map()을 사용해서 반복되는 컴포넌트(동일한 스타일과 값을 가진 컴포넌트)를 효율적으로 관리해 줍니다.
- comment: comments의 데이터
- key: index처럼 0부터 시작합니다.
2. {comment.commentBody}: comment에는 JSON 형식으로 데이터가 저장되어 있어서 comment.속성명으로 데이터를 가져와야만 합니다.
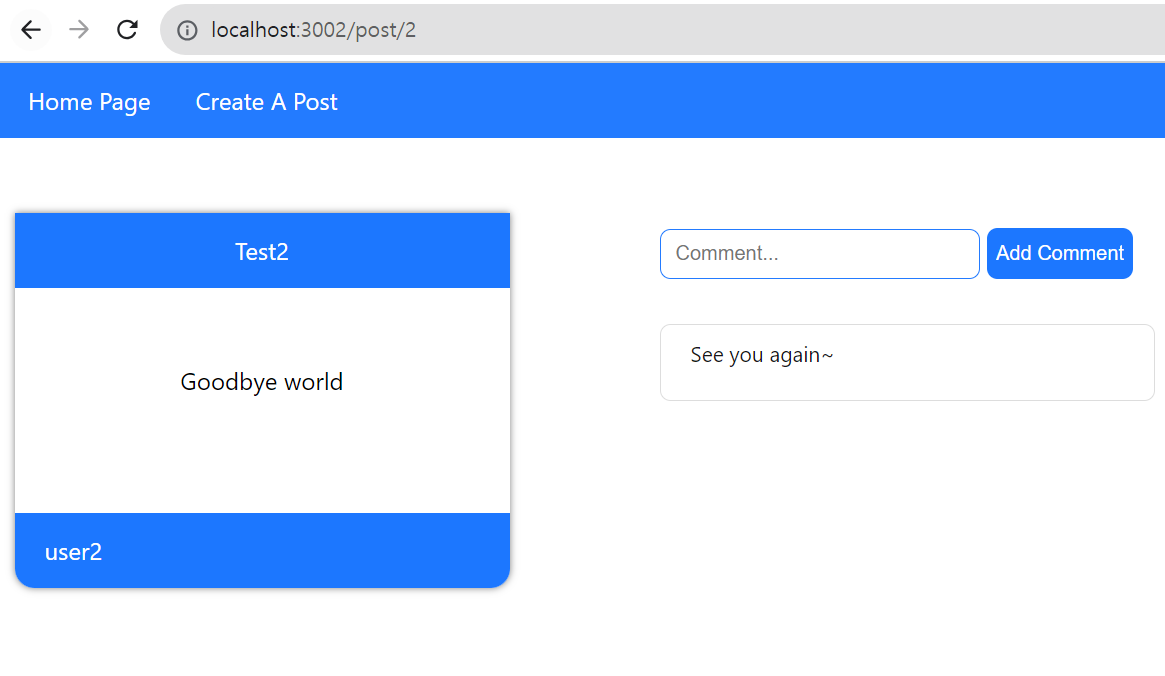
📌 결과

📌 느낀 점
오늘은 댓글을 작성한 후 바로 브라우저로 보이게 할 수 있는 방법에 대해 배웠는데 전에 배웠던 부분과 비슷한 코드가 많아서 어렵지 않게 한 것 같습니다.
그리고 useState([])를 이렇게 배열로 사용할 때 원본 데이터를 복사한 다음 넣는 과정을 반복해서 코드가 많이 지저분해진 적이 있었는데 이렇게 한 줄로 표현할 수 있다는 걸 알게 되었습니다.
가독성이 좋은 코드를 구현해 내는 것에 많은 관심이 있었는데 조금이라도 성장하는 것 같아 설레는 마음으로 공부하게 되는 것 같습니다.
728x90
'MySQL' 카테고리의 다른 글
| React, MySQL 풀스택 9일차 (로그인 암호화해서 세션에 저장하기) (2) | 2023.10.21 |
|---|---|
| React, MySQL 8일차 (로그인 기능 만들기) (2) | 2023.10.16 |
| React, MySQL 6일차 (테이블에 외래키 추가하기) (3) | 2023.10.15 |
| CSV 파일을 DB에 가져오기 (HeidiSQL 사용) (0) | 2023.10.09 |
| React, MySQL 풀스택 5일차 (useParams로 포스터 내용 보여주기) (0) | 2023.09.25 |